For any home in Singapore that is looking for an appropriate method to dispose of waste, a rubbish chute proves to be invaluable. Whether you are thinking of replacing your current rubbish chute system or introducing a new one in your home, this article will give you a step-by-step guide on how to install a rubbish chute.
If you are a homeowner interested in increasing convenience or you need to replace an outdated chute, the following steps will ensure a smooth process.
Why Install a Rubbish Chute?
As a homeowner, I’ve experienced firsthand how installing a rubbish chute significantly improves convenience and hygiene. Unlike having to transport waste in multiple trips to a central bin or deal with sacks that are filled to the brim with trash, a rubbish chute elevates the course and convenience of waste disposal, especially for the high-rise apartments that are common in Singapore.
These chutes take waste directly to a certain point, hence eliminating smells, insects, and any extra nuisance of handling garbage. Further, for households, which include elderly people, or people with a tight schedule, the rubbish chutes are of immense benefit. I can still recount the time when my elderly neighbor used to have issues with disposal of waste before she was gifted with the full set of a rubbish chute.
Today, she cannot comprehend how it has proved to be time-saving and secured her housekeeping and cooking tasks. Also, Affordable Rubbish Chute Singapore specializes in rubbish chute repair and replacement services in Singapore.
Steps to Install a Rubbish Chute
1. Check Local Regulations and Approvals
Rubbish chute installation in Singapore is subject to building regulations, especially for HDB flats and private properties. Homeowners are required to ensure compliance with safety and fire codes. Before beginning the installation:
- Obtain Approval: Check with the Housing & Development Board (HDB) or relevant authority.
- Hire Licensed Contractors: Engaging certified professionals ensures compliance and quality work. I’ve seen cases where unapproved installations resulted in hefty fines or required costly rectifications.

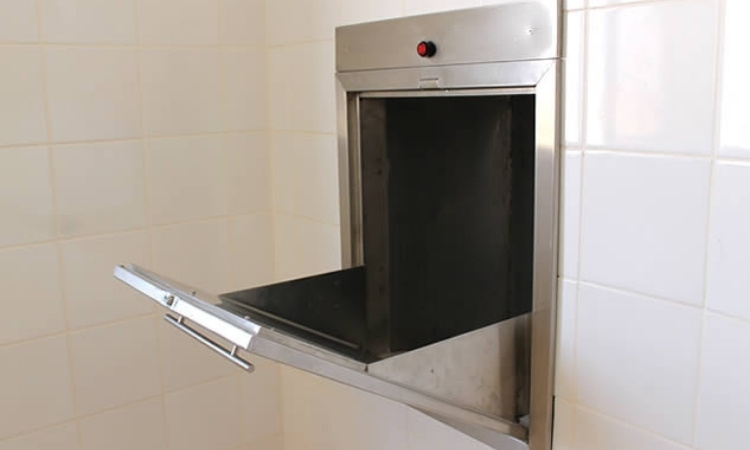
2. Choose the Right Rubbish Chute
Selecting the right rubbish chute is crucial. From my experience, The type of rubbish chute needs to be chosen wisely. From my practical experience, stainless steel chutes are the most preferred due to their durability, resistance to rust, and ease of cleaning compared to other types of chutes. Here’s what to consider:
- Size and Dimensions: Ensure that you measure your installation space correctly. A chute that is either too small or too big can result in several problems when in use.
- Features: Look for options with noise-reducing features, airtight seals to minimize odors, and pest-resistant designs.
- Aesthetics: Modern chutes are designed to have fancy exteriors that are perfect to match the interior of your house.
3. Engage a Professional Installer
Although many home improvement enthusiasts might feel inclined to attempt the installation themselves, I urge them to acquire professional help. Professionals handle:
- Wall Modifications: Precise cutting to get proper fitting of the chute without having to weaken the structure of the chute.
- Sealing and Alignment: Make sure that the chute is tightly fitted so that there will be no issues relating to leakage or pest infestation.
- Regulation Adherence: Ensuring installation meets legal requirements.
4. Prepare the Installation Area
The level of preparation determines how well this process will be executed. Here’s what I’ve learned:
- Clear the Area: Clear the surrounding area of any furniture or any other items near the installation site to provide easy access.
- Inspect the Wall: Make sure the wall where you install a rubbish chute is strong and has no cracks or moisture problems that may affect the process.
- Double-Check Measurements: An error in this area can result in a wrong size cut or extra charges.
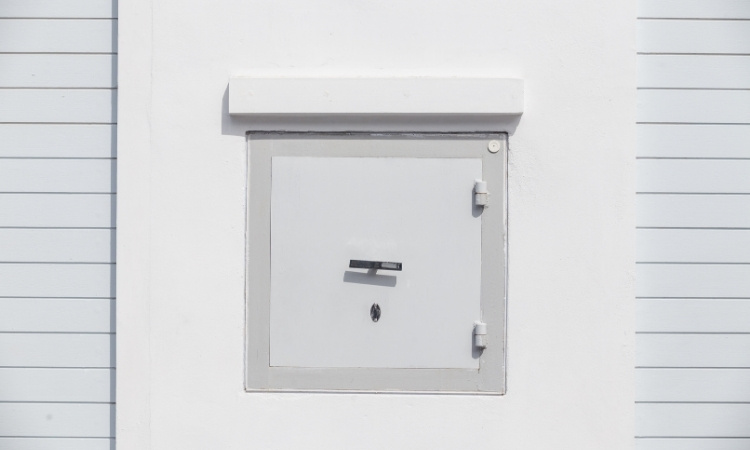
5. The Installation Process
Here’s how a typical installation unfolds:
- Old Chute Removal: If the person is installing a new chute, then the previous chute is taken out so that it does not damage the wall in any way.
- Wall Cutting: For new installations, a precise opening is cut into the wall. Dust sheets are often used to minimize mess.
- Chute Placement: The chute is inserted into the wall opening, ensuring a snug fit.
- Securing the Chute: Cooper bolts, brackets, and high-quality sealants are used to hold the chute very strongly and tightly. Silicone sealants work better than others because they help attain an airtight seal.
- Final Adjustments: The installer checks for proper alignment and ensures smooth functionality of the chute door.
6. Post-Installation Maintenance Tips
To maximize the lifespan of your rubbish chute:
- Clean Regularly: Clean the interior with a disinfectant at least once a week to prevent bacterial growth, more so in regions with high humidity like Singapore.
- Inspect Seals: Ensure that the seals are regularly inspected to avoid developing odors or attracting pests.
- Lubricate Hinges: In order to allow easy opening and closing of the chute door, it is important to apply lubricant every now and then.
Conclusion
Having a rubbish chute is not a mere luxury but a necessity in the expanded premises of Singapore and a symbolic sweep to reclaim your space against mess and dirt. By learning how to install a rubbish chute, choosing the right material, and hiring a professional or contractor, you can make the rubbish chute installation a clean, smooth, and legal process. Do not let the disposal of wastes be a bothersome task—call for a new rubbish chute installation and find out how convenient having one is!